Growing cannabis from seed to harvest is completely doable at home, even if you have never grown a plant in your life. The full process takes roughly 3 to 6 months depending on your strain and setup, and it breaks down into six clear stages: planning and legality, germination, seedling, vegetative, flowering, and harvest/cure. This guide walks you through every one of them with the specific targets, schedules, and troubleshooting tips you need to actually pull it off.
How to Grow Weed From Start to Finish Seed to Harvest
Marcus Holbrook
24 Mar 2026
Before you start: legality, setup choice, and planning
Check your local laws before you buy a single seed. This is the step most first-timers skip, and it can have serious consequences. Cannabis cultivation laws vary not just by country or state, but by city and county. California, for example, allows adults 21 and older to grow up to 6 plants at home under state law, but individual municipalities can impose stricter rules or require local permits before you start. Washington state, as of early 2026, still prohibits recreational home growing entirely, with proposed legislation that would allow up to 6 plants per adult and a 15-plant household cap, though that had not yet passed into law. The NCSL State Cannabis Policy Enactment Database is a reliable starting point for checking your state's current rules, but always verify with your city or county as well.
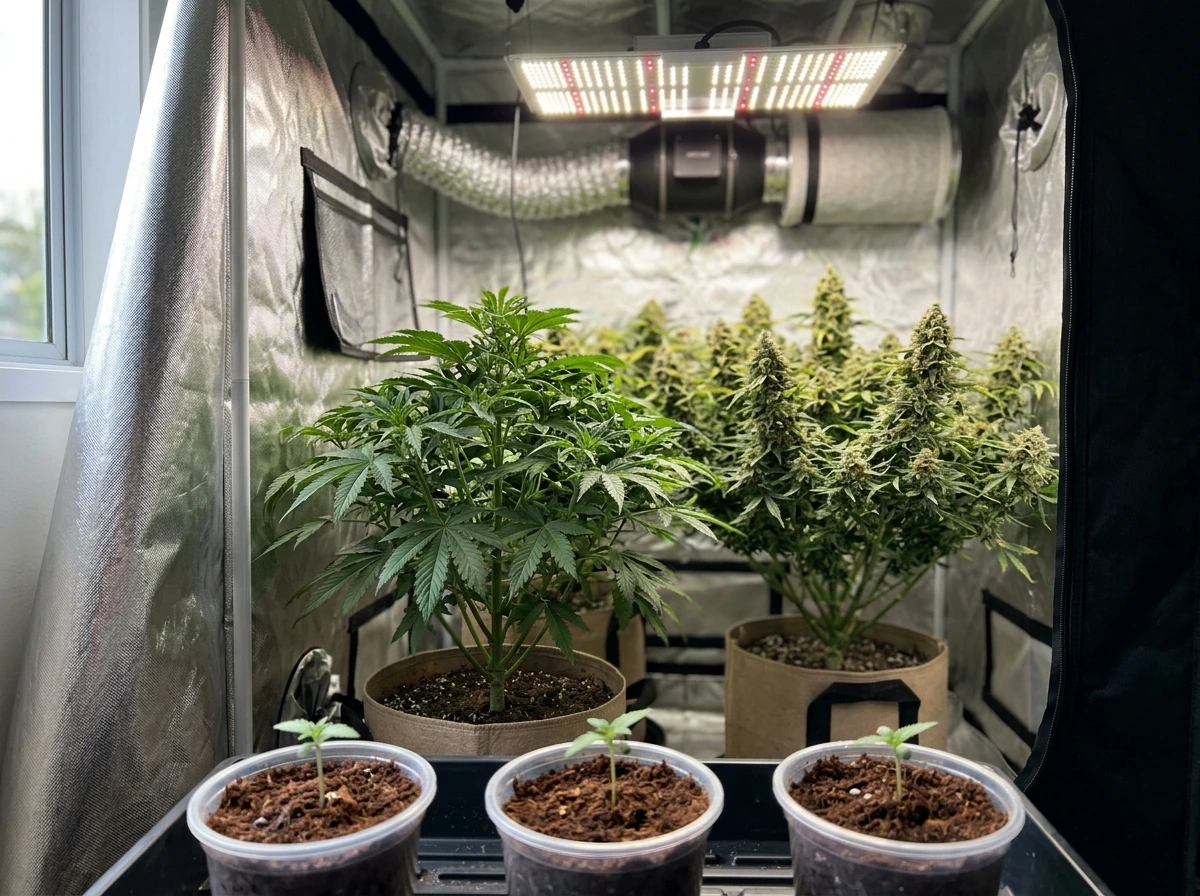
Once you know you are legally clear to grow, decide on your setup. You have three main paths: indoor growing under artificial lights, outdoor growing in soil in your garden or on a patio, and hydroponic systems that feed roots directly in nutrient-enriched water. Each method works well, and none is objectively better. Indoor gives you total environmental control and year-round growing but costs more to run. Outdoor is low-cost and produces large plants but ties you to seasonal light cycles and exposes plants to weather and pests. Hydroponics can accelerate growth significantly but has a steeper learning curve and less margin for error. Pick the one that fits your budget, space, and how much time you want to invest.
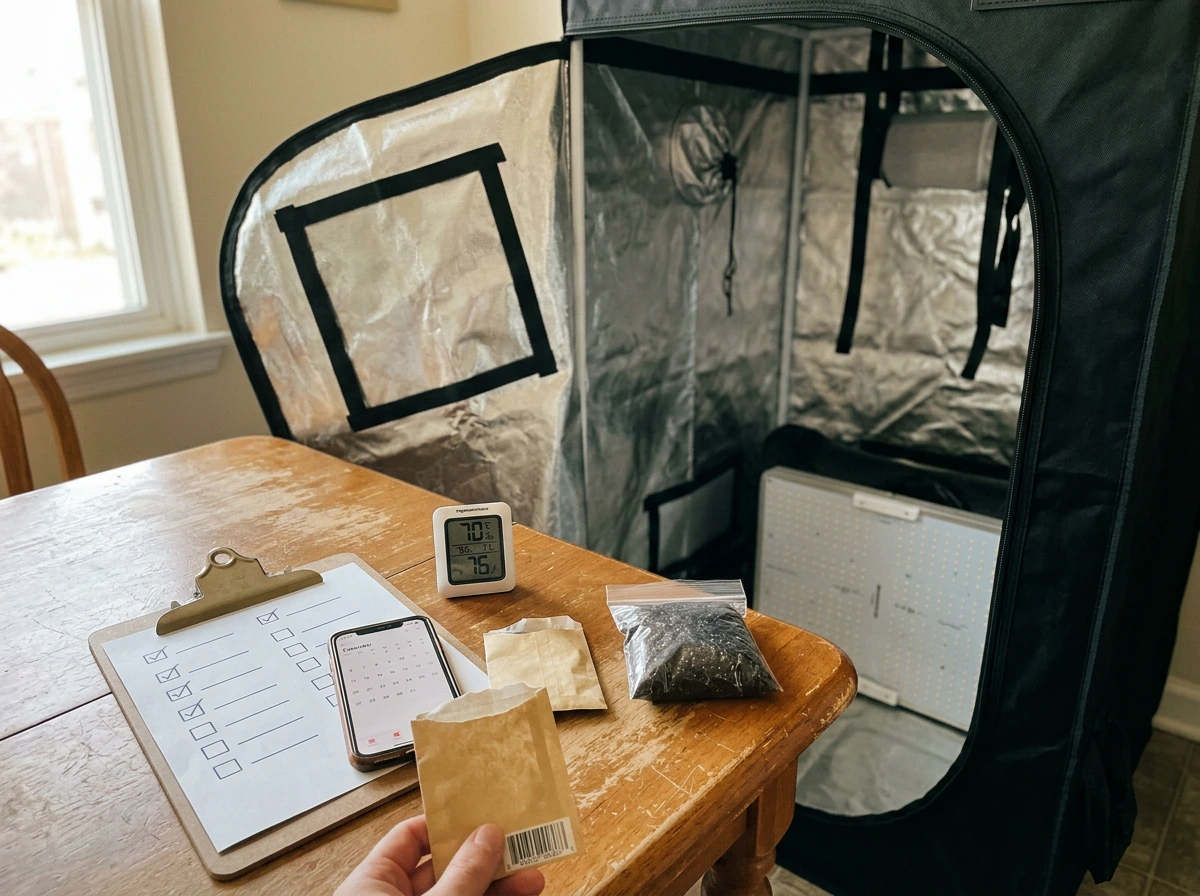
For a basic indoor setup you will need: a grow tent (a 2x2 or 2x4 foot tent works for 1 to 4 plants), a full-spectrum LED light sized to your tent (at minimum 200 true watts for a 2x2), a ventilation fan and carbon filter, a thermometer/hygrometer, pH and EC meters, growing medium (soil or coco coir for beginners), and containers. Budget realistically for these items before starting. Trying to cut corners on lights or ventilation is the most common reason first grows go sideways.
Strain and seed selection, plus germination basics
Strain choice matters more than most beginners think. Your strain determines how long the plant takes to mature, how big it gets, how much attention it needs, and what kind of effect the final product has. For first-time growers, autoflowering strains are the most forgiving option. They flower automatically based on age rather than light cycle, finish in 60 to 90 days from seed, stay compact, and are generally more resilient. Photoperiod strains give you more control over plant size and yield but require you to manually trigger flowering by changing your light schedule, which adds a layer of management.
Buy seeds from a reputable seed bank that ships to your region and sells feminized seeds. Feminized seeds are bred to produce only female plants, which are the ones that produce the buds you are after. Regular seeds produce roughly 50 percent male plants, which you would need to identify and remove before they pollinate your females. For beginners, feminized autoflowering seeds are the easiest starting point. Indica-dominant strains tend to stay shorter and finish faster, which is practical for small indoor spaces.
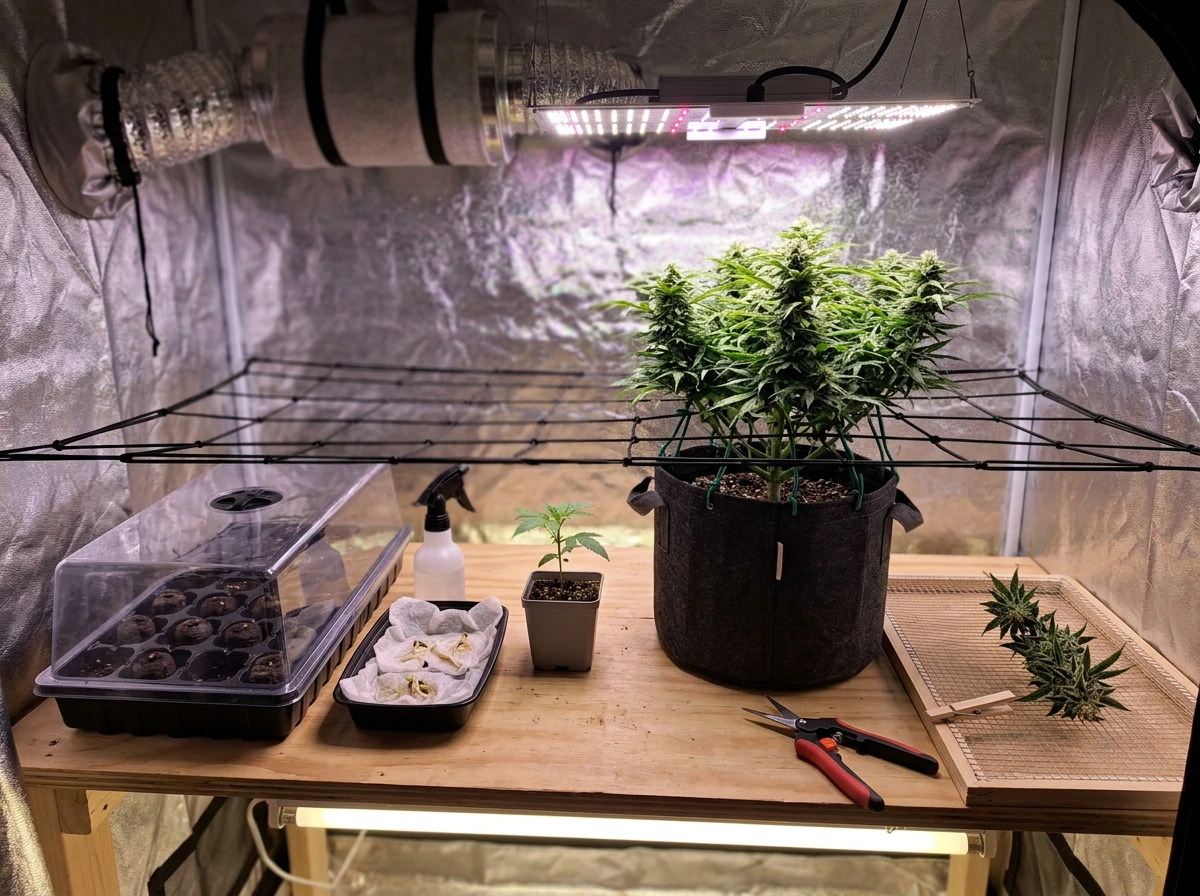
How to germinate your seeds
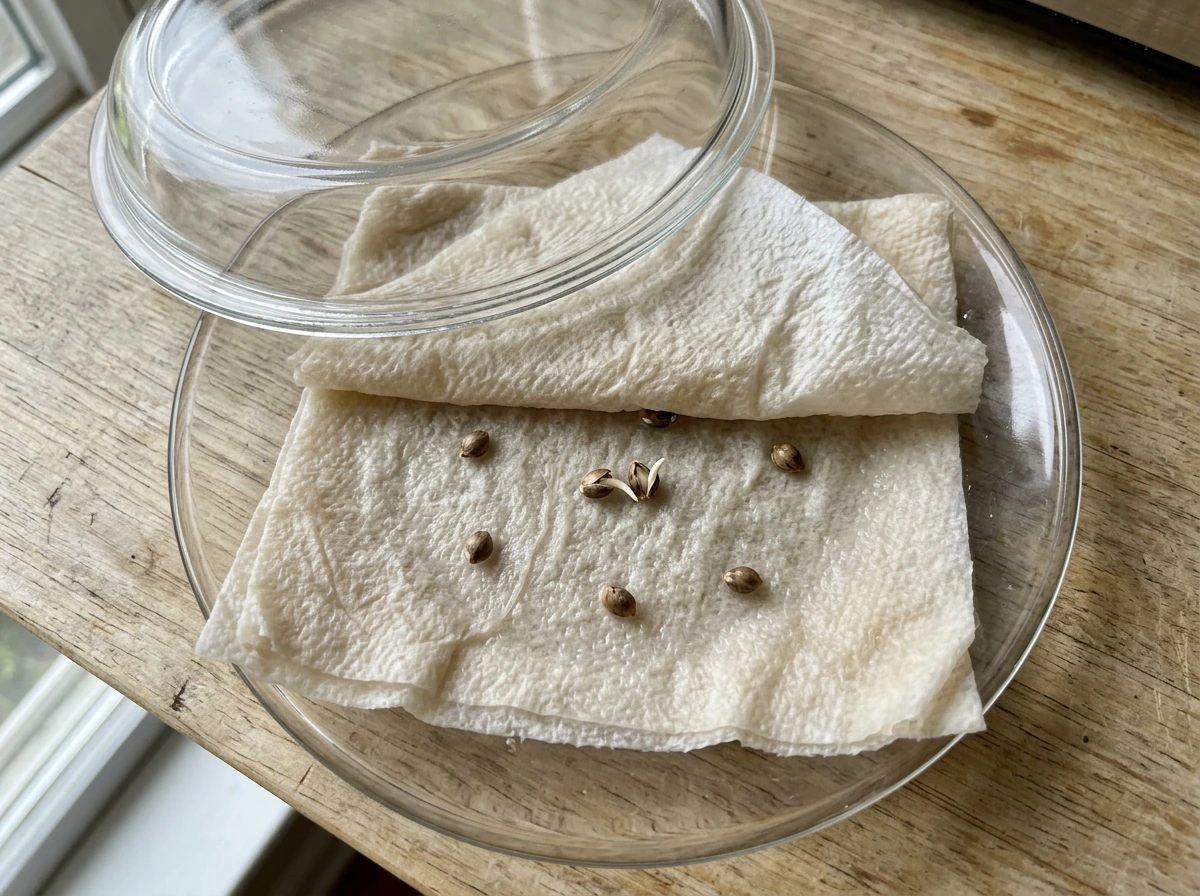
The paper towel method is the simplest and most reliable germination approach. Dampen two paper towels, place your seeds between them, put the whole thing on a plate, and cover with another plate to hold in moisture and block light. Keep it somewhere warm, around 70 to 77 degrees Fahrenheit (21 to 25 degrees Celsius). Check every 12 hours. Most seeds will crack and show a small taproot (the white root tip) within 24 to 72 hours. Once the taproot is about a quarter inch long, it is ready to plant. Gently place it taproot-down in a small container of lightly moist growing medium, about a quarter inch deep. Do not overwater at this stage. A gentle mist is enough.
Seedling phase: environment, lighting, and transplanting
The seedling stage runs from the moment your seed sprouts above the soil to when it has developed 3 to 4 sets of true leaves, typically 2 to 3 weeks. This is the most delicate phase. The plant's root system is tiny, which means it is very easy to overwater. A common mistake I made early on was watering too frequently because the surface looked dry while the deeper medium was still wet. Lift the pot. If it feels light, water. If it still has weight, wait.
Environmental targets during the seedling stage: temperature between 68 and 77 degrees Fahrenheit (20 to 25 degrees Celsius), humidity between 60 and 70 percent relative humidity (RH), and gentle airflow from a small fan to strengthen stems without stressing the plant. Do not put seedlings under full-intensity light. A full-spectrum LED run at 30 to 50 percent power, positioned 24 to 30 inches above the seedling, is more than enough. Too much light intensity at this stage causes bleaching and stunts growth.
For photoperiod strains, keep seedlings on an 18-hours-on, 6-hours-off light schedule. Autoflowering seedlings can stay on 18/6 for their entire life, or up to 20/4 if you want to maximize light exposure. Hold off on nutrients entirely during the seedling stage if you are growing in quality potting soil, which usually contains enough nutrition for the first 2 to 3 weeks. In coco coir or hydro, start with a very diluted seedling-specific nutrient solution from day one.
Transplanting: start seedlings in small containers (a 1-liter or solo cup-sized pot works well) and move up to a larger final container once roots begin circling the bottom or the plant looks too big for its pot. For most photoperiod plants, a 3 to 5 gallon container is a good final home. For autoflowering strains, plant directly into the final container since they do not handle transplant stress as well and their tight timeline leaves less recovery time.
Vegetative phase: growth targets, nutrients, and training
The vegetative stage is when your plant puts on size and structure. For photoperiod plants under an 18/6 light schedule indoors, this stage lasts as long as you want it to, typically 4 to 8 weeks. The longer you veg, the bigger the plant and the larger the potential yield, though you are also constrained by your tent or space. A good rule of thumb: flip to flower when the plant is roughly half the final height you want, since cannabis can double in height during flowering. Outdoor photoperiod plants veg naturally through spring and summer and begin flowering as day length shortens in late summer.
Environmental targets during veg: temperature 70 to 85 degrees Fahrenheit (21 to 29 degrees Celsius), humidity 50 to 70 percent RH, and strong airflow to promote thick stems. Your light should be running at full power now, positioned at the manufacturer's recommended distance for your specific fixture, usually 18 to 24 inches above the canopy for most LED panels. Adjust based on any signs of light stress (bleaching, upward leaf curl) or light deficiency (stretching, pale color).
Nutrients and pH during veg
During vegetative growth, plants need higher levels of nitrogen relative to phosphorus and potassium. Most commercial nutrient lines label products with this in mind. Follow the manufacturer's feed chart, but start at half the recommended dose and increase only if the plant shows signs of deficiency (yellowing, pale new growth). It is far easier to recover from underfeeding than from overfeeding, which can lock out nutrients and burn roots.
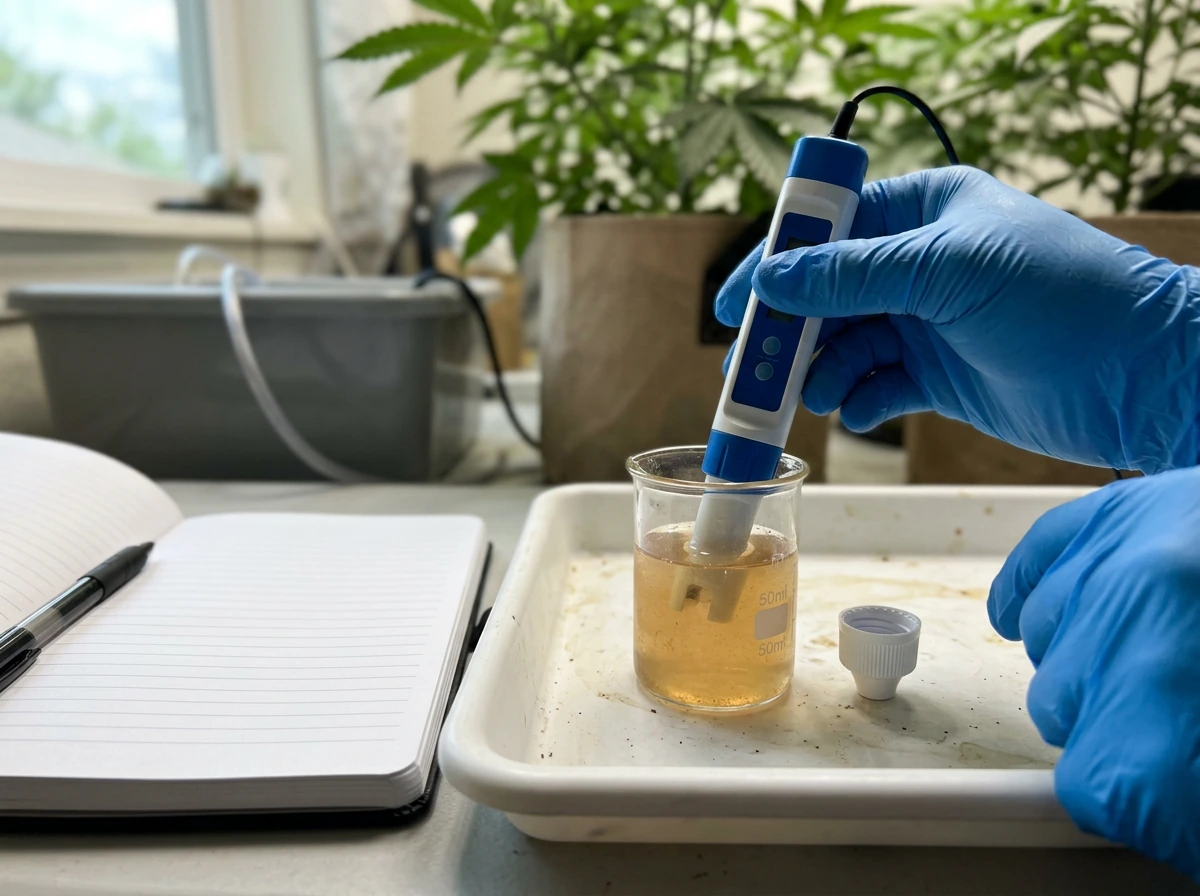
pH is one of the most important and most overlooked variables in home growing. Even if you are feeding the right nutrients, a wrong pH means the plant cannot absorb them, and you end up chasing deficiency symptoms that are actually lockout. Target pH 6.0 to 7.0 for soil (6.2 to 6.8 is the sweet spot), and pH 5.5 to 6.5 for coco or hydroponic systems. Always pH your water and nutrient solutions before watering. A cheap digital pH meter and pH up/down solution costs under $20 and will save you countless headaches. EC (electrical conductivity) measures the total concentration of nutrients in your solution. During veg, target an EC of 1.2 to 2.0 mS/cm depending on plant size and growth stage.
Training your plants
Training techniques help you control plant shape, maximize light coverage, and increase yields without needing more space. Low-stress training (LST) involves gently bending and tying down main stems to encourage horizontal growth and more bud sites. It is beginner-friendly and can be done throughout veg. Topping, which means cutting the main growing tip to create two main colas instead of one, is a high-stress technique that takes a week of recovery time but significantly increases yield potential. Screen of Green (ScrOG) involves weaving branches through a horizontal net to create an even canopy, maximizing light exposure across all bud sites. Start with LST if you are new, and explore topping and ScrOG once you are comfortable with the basics.
Flowering phase: timing, environment, and keeping problems out
For photoperiod plants, you trigger flowering by switching your light schedule to 12 hours on, 12 hours off. This mimics the shortening days of late summer and signals the plant to shift from growing to reproducing. The flowering stage typically lasts 8 to 12 weeks depending on strain. Autoflowering plants begin flowering on their own schedule, usually 3 to 5 weeks from germination, so you just maintain the same light schedule and watch for the transition.
Environmental targets shift during flowering. Temperature should stay between 65 and 80 degrees Fahrenheit (18 to 26 degrees Celsius), with lights-off temperatures no more than 10 degrees cooler to avoid condensation. Humidity is the critical variable to control here: target 40 to 50 percent RH during early to mid flower, and drop it further to 35 to 45 percent in the final 2 weeks before harvest to reduce mold risk and encourage trichome production. High humidity during late flower is one of the primary causes of bud rot (Botrytis), which can devastate a harvest in days.
Nutrients shift during flowering too. Reduce nitrogen and increase phosphorus and potassium to support bud development. Most nutrient lines have a bloom-specific formula designed for this. In the final 1 to 2 weeks, many growers do a flush by feeding only plain pH-adjusted water to clear residual nutrients from the medium, which some believe improves the final taste and smoothness of the smoke. Whether flushing makes a measurable difference is debated, but it does not hurt and is easy to do.
Pest and mold prevention during flower
Flowering plants are more vulnerable to pests and disease than at any other stage. Spider mites, fungus gnats, and aphids are the most common insect problems for indoor growers. Preventive measures are far more effective than trying to treat an active infestation mid-flower: keep humidity in the target range, maintain strong airflow through and around the canopy, inspect plants every 2 to 3 days on the undersides of leaves (where pests hide), and quarantine any new plants before introducing them to your grow space.
For fungus gnats, which breed in moist topsoil, let the top inch or two of your medium dry out between waterings. Yellow sticky traps near the base of plants catch adults and help you gauge infestation levels. For spider mites, a diluted neem oil spray applied during lights-off can help early in veg, but avoid spraying anything on flowering buds since residue can affect taste and quality. In late flower, stick to environmental controls and physical removal. Powdery mildew (white, powdery spots on leaves) and botrytis (grey fuzzy mold inside dense buds) are both humidity-driven problems. If you see either, remove affected material immediately and drop your RH.
Harvest and curing: getting this part right matters as much as the grow
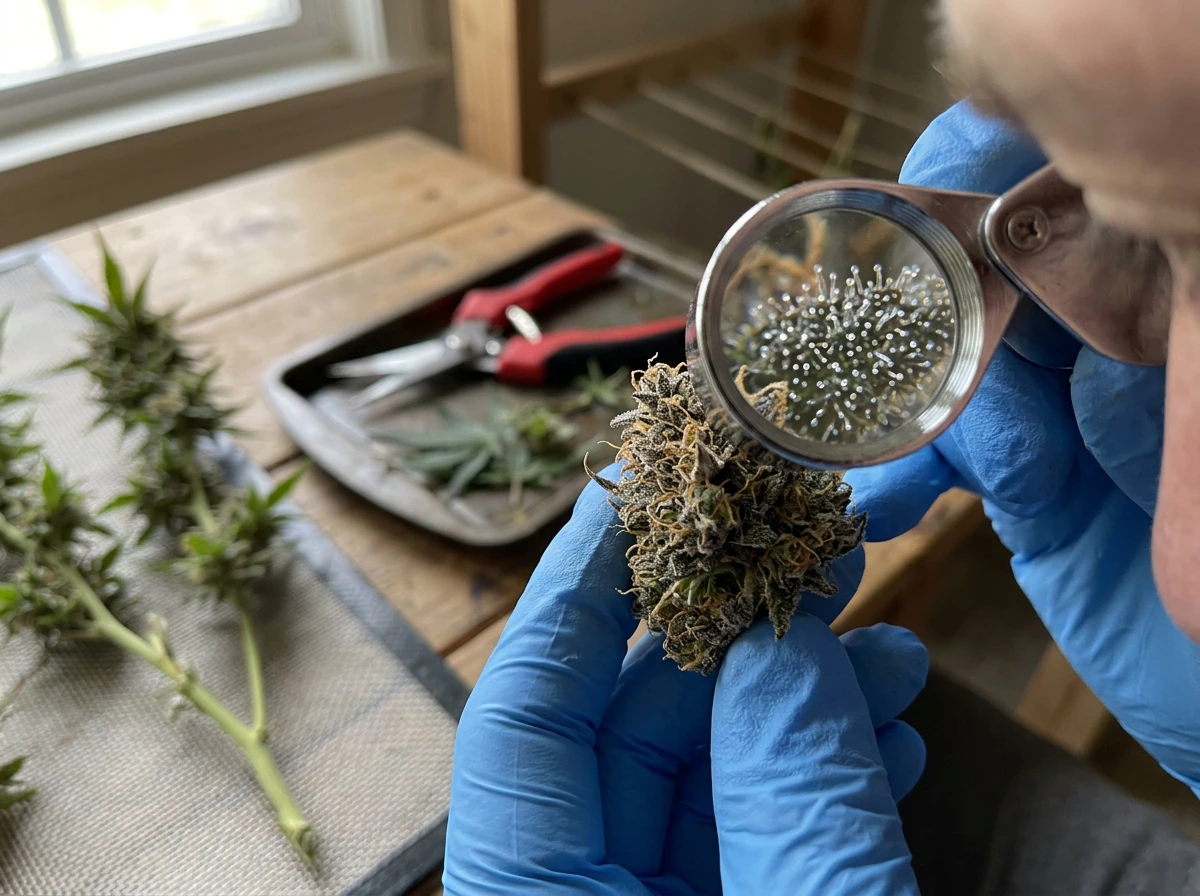
Harvesting at the right time is one of the biggest factors in the quality of your final product. The most reliable method is checking trichomes (the tiny crystal-like structures on buds and sugar leaves) under a jeweler's loupe or digital microscope at 60x to 100x magnification. Trichomes start clear, turn milky white as THC peaks, and then amber as THC degrades into CBN. For a balanced, potent effect, harvest when most trichomes are milky with roughly 10 to 20 percent amber. For a more relaxing, sedating effect, let amber percentage creep higher. Harvesting when trichomes are still mostly clear means you have pulled too early and left potency on the table.
Secondary indicators include pistil color (the hair-like structures on buds). When 70 to 90 percent of pistils have turned from white to orange or red, the plant is approaching harvest. Use pistil color as a rough guide and trichomes for the final call. Strain-specific flowering time on the seed bank's website also gives you a useful window to work within.
Drying your harvest
After cutting the plant down, hang whole branches or individual buds upside down in a dark, well-ventilated space. Target temperature 60 to 70 degrees Fahrenheit (15 to 21 degrees Celsius) and humidity 45 to 55 percent RH. Drying too fast, which happens if your space is too warm or dry, locks in chlorophyll and gives the finished product a harsh, grassy taste. Drying too slow increases mold risk. A slow dry over 7 to 14 days produces noticeably better results than a quick 3 to 4 day dry. Buds are ready to move to curing when the small stems snap rather than bend, and the outside of buds feels dry to the touch while still slightly spongy inside.
Curing for quality and longevity
Curing is where good bud becomes great bud. Trim your dried buds, place them loosely in wide-mouth glass mason jars (fill jars to about 75 percent capacity), seal them, and store in a cool dark place. For the first week, open the jars once or twice a day for 15 to 30 minutes to release moisture and exchange air, a process called burping. After the first week, if humidity inside the jars stays between 58 and 65 percent (use small Boveda or similar humidity packs to monitor and regulate), you can reduce burping to once every few days. A minimum cure of 2 to 4 weeks makes a significant difference in flavor, smoothness, and aroma. Curing for 6 to 8 weeks produces noticeably better results for most strains.
For storage beyond the cure period, keep jars sealed in a cool, dark, dry location. Properly cured and stored cannabis maintains quality for 6 to 12 months. Light and heat are the primary factors that degrade potency over time, so avoid clear containers and warm spots.
Quick reference: targets for each stage
| Stage | Duration | Temp (°F) | Humidity (RH%) | Light Schedule | Key Focus |
|---|---|---|---|---|---|
| Germination | 1 to 5 days | 70 to 77 | 70 to 90 | None or very dim | Moisture and warmth |
| Seedling | 2 to 3 weeks | 68 to 77 | 60 to 70 | 18/6 (or 20/4 for autos) | Gentle light, minimal water |
| Vegetative | 4 to 8 weeks | 70 to 85 | 50 to 70 | 18/6 (photoperiod) | Nutrients, training, root health |
| Flowering | 8 to 12 weeks | 65 to 80 | 40 to 50 (drop to 35 to 45 late) | 12/12 (photoperiod) | Bud development, pest/mold prevention |
| Drying | 7 to 14 days | 60 to 70 | 45 to 55 | Dark | Slow, even drying |
| Curing | 4 to 8 weeks | 60 to 70 | 58 to 65 (in jars) | Dark | Daily burping, humidity monitoring |
The most common beginner mistakes (and how to avoid them)
- Overwatering: the single most common killer of young plants. Water only when the pot feels light or the top inch of soil is dry.
- Skipping pH checks: even perfect nutrients cannot be absorbed at the wrong pH. Test every time you water.
- Too much light too soon: seedlings do not need full intensity. Dial back power and keep lights higher during the first few weeks.
- Harvesting too early: impatience is expensive. Get a loupe and check trichomes. Clear trichomes mean wait.
- Rushing the dry and cure: a 3-day dry and a 1-week cure will produce noticeably inferior results compared to taking your time. The grow is done when the jar is properly cured, not when you cut the plant.
- Ignoring local laws: laws change regularly and vary at the city level. Recheck before every grow cycle.
Your next steps from here
If this is your first grow, start simple. One autoflowering feminized plant in a small indoor tent gives you the best combination of control, learning opportunity, and manageable scale. Get your environment dialed in before you start stacking training techniques or complex nutrient protocols. Once you have one successful grow under your belt, the second one will be dramatically easier because you will know your specific setup's quirks.
From here, you might want to go deeper on specific stages. ...more to explore around <anchortext>seedling care</anchortext> and early transplanting techniques, as well as the nuances of taking a plant from seed all the way through harvest in a single consistent workflow. If you are growing in a specific region with unique climate or legal considerations, it is worth researching the local specifics, since what works in a humid coastal environment may need adjustment for an arid inland climate. how to grow weed seedlings The fundamentals in this guide apply everywhere, but the fine-tuning is always personal to your space, strain, and setup. how to grow weed from weed
FAQ
How many plants can I grow if I’m using a small 2x2 tent, and how do I choose the right count?
In a 2x2 tent, start with 1 plant if you want maximum headroom for training and airflow, or up to 2 if you keep it low-stress and don’t rely on aggressive canopy stretching. For 3 or more plants, you usually run into uneven light coverage and harder pest monitoring, especially during flowering when humidity control matters most. Match plant count to your ability to inspect leaf undersides every 2 to 3 days.
Is it better to use soil or coco coir for a first attempt?
Soil is generally more forgiving because it buffers watering errors and typically needs fewer daily measurements. Coco can produce strong results, but it depends on tighter pH and more consistent feeding from early on. If you want to minimize variables, choose quality potting soil, then only add nutrients after the plant shows it needs them.
What should I do if my seeds sprout but the seedling struggles to get above the soil line?
This is often caused by planting too deep or the medium staying too wet and oxygen-starved. Remove the top layer gently (only if you can see the sprout stuck), keep the surface lightly moist instead of saturated, and maintain gentle airflow. If the seed husk stays stuck on the top, don’t pull it hard, mist the area to soften it and improve moisture conditions.
How do I tell the difference between overwatering and nutrient deficiency in early seedlings?
Overwatering usually shows up as droop plus slow growth, and the medium feels heavy or remains wet longer than expected. Nutrient deficiency often shows up as color changes that start on older leaves (for some deficiencies) while the medium weight pattern looks normal. Use the “lift the pot” check and only adjust fertilizer after you confirm the watering pattern is correct.
Why is my plant stretching or growing tall too fast during veg?
The most common cause is light being too far away or too weak, which triggers vertical growth. Another frequent cause is high humidity and weak airflow, which can reduce sturdy stem development. Fix by moving the light closer within the safe range for your fixture and ensuring consistent airflow, then wait about a week to see whether internodes tighten.
What’s the safest way to adjust pH if my readings are inconsistent?
First, check calibration of your pH meter (using the correct calibration solutions) and rinse the probe between readings. Mix nutrients and water thoroughly, measure after the solution is stable, and avoid testing right after aggressive bubbling. If your pH swings each time, your mixing order may be off, consider adding pH adjuster slowly to the final solution rather than to water and nutrients separately.
Do I need to run EC and pH at every watering, or can I just do it once?
For best consistency, measure pH at least for the first few feedings and whenever you notice symptoms, because drift can happen after runoff. EC is most useful to trend changes over time, you don’t need perfect precision for every pour if you’re staying within the target range. The key is consistency in how you mix, measure, and adjust each time.
Should I flush before harvest, and what’s a practical approach if I’m unsure?
Flushing is optional, and many growers skip it because results can vary by grow medium and nutrient system. If you want a simple method, reduce to plain pH-adjusted water only in the last 7 to 10 days, and stop if the plant shows severe deficiency stress. Avoid large, sudden swings in runoff behavior, especially if you’re in coco where salts can build up quickly.
How can I reduce the risk of bud rot without sacrificing too much airflow?
Bud rot prevention is mostly environmental: keep RH in-range and avoid late-flower humidity spikes. Use airflow that reaches under the canopy, and don’t overcrowd plants. Also, stop watering early enough that the medium is not constantly wet, and remove any damaged leaves immediately so moisture does not get trapped inside dense areas.
My pistils are turning color, but trichomes are still clear. What should I trust?
Trust trichomes for timing the harvest because pistils can change due to stress, lighting, or strain variability. Use pistils as a rough indicator only, then do a final check when the lights have been on long enough for a stable look. If trichomes are mostly clear, wait, even if pistils look mostly done.
What’s the most common mistake during drying, and how do I avoid mold?
The most common mistake is drying too fast, which creates harsh flavor, or drying too slow, which raises mold risk. Aim for the balance you described: 7 to 14 days, 60 to 70°F, and mid-range humidity. If buds feel overly wet or stems don’t snap near the end, your humidity is likely too high or airflow too weak, increase ventilation slightly rather than adding heat.
How do I know if my cure jars are too wet or too dry?
If humidity inside jars rises above your target range consistently, you need more burping or slightly drier room conditions. If jars smell very hay-like and humidity drops below target quickly, that often means your buds are too dry already and may lose some aroma. Use a humidity monitor inside the jar, and adjust burping frequency gradually rather than opening constantly.
How long can I store cannabis after curing, and how should I prevent potency loss?
Quality typically holds for months when stored correctly, the biggest killers are light, heat, and repeated opening. Keep jars sealed, store them in a dark, cool place, and avoid clear containers. If you need frequent access, consider moving portions into smaller jars so you don’t repeatedly expose the full batch to air and temperature changes.
Next Article
How to Grow Weed From Seed NZ Indoors: Beginner Guide
Step-by-step NZ indoor cannabis grow from seed: germinate, seedlings, veg, flower, harvest, curing, troubleshooting, leg