The Medicinal Cannabis Scheme does not change this for home growers. The Ministry of Health is clear: the scheme does not enable recreational use and does not allow patients to grow their own cannabis. Medicinal cannabis cultivation is performed under a commercial licence, with mandatory security arrangements and ongoing inspections by the Medicinal Cannabis Agency. There is no legal pathway for a home cultivator in New Zealand to grow cannabis as of March 2026, regardless of whether the intention is personal medical or recreational use.
This guide is written as a practical education resource. The growing methods described here are widely practised in jurisdictions where home cultivation is legal, such as Canada, parts of Australia, and several US states. If you are reading this from one of those places, or if New Zealand law changes in the future, this guide gives you a complete, step-by-step framework. Wherever you are, know your local law, act responsibly, and prioritise your own safety. Advocacy organisations like NORML NZ continue to push for law reform if that is something you care about.
Planning your indoor setup before week 1
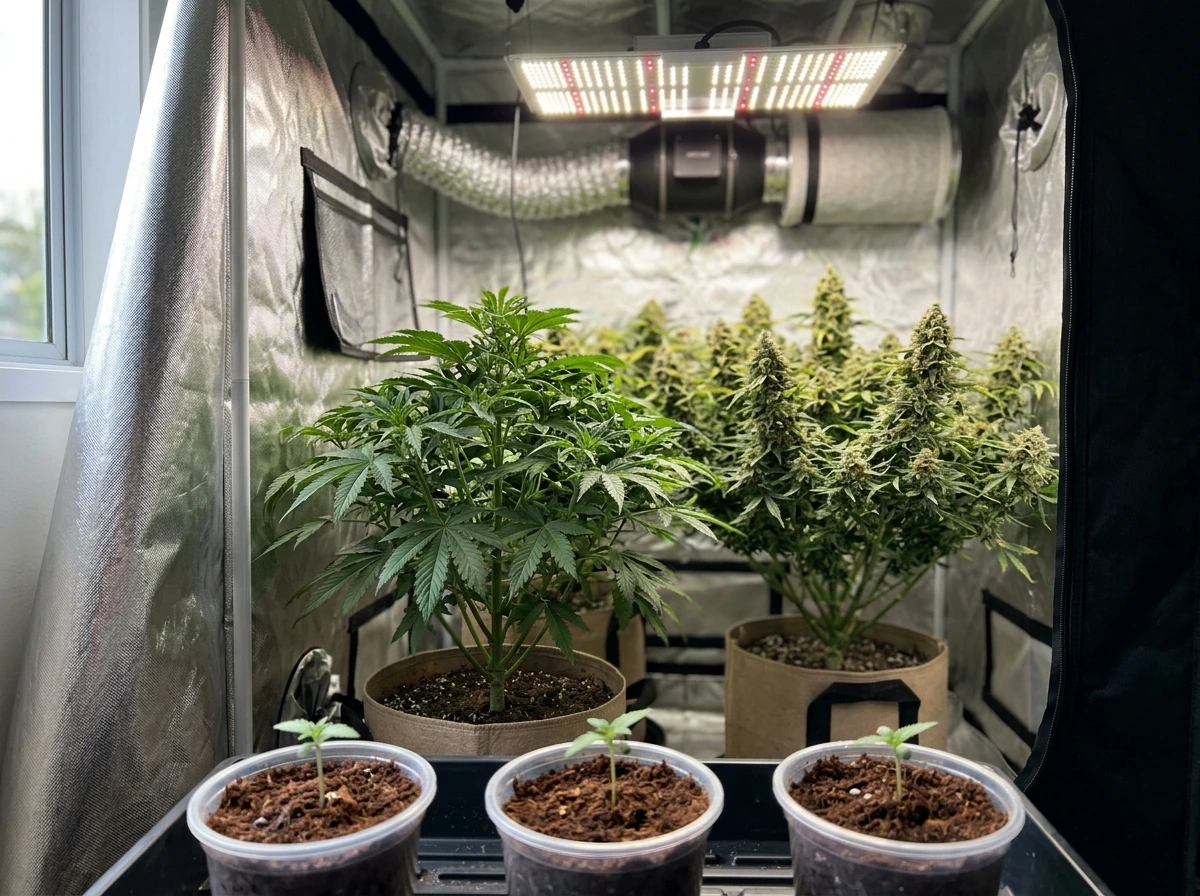
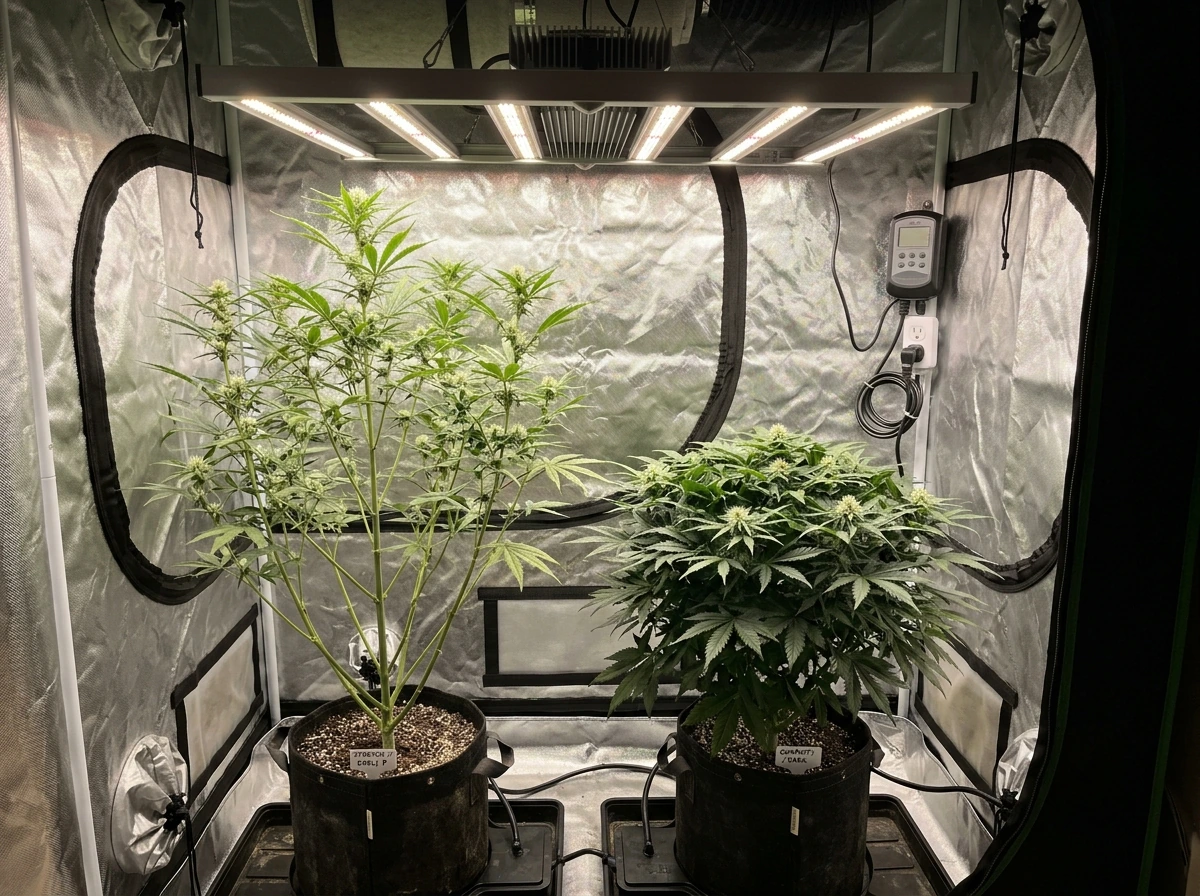
Indoor growing in New Zealand's climate makes a lot of sense from a cultivation standpoint. Outdoor seasons are compressed in many regions, humidity swings dramatically between the North and South Islands, and indoor growing gives you full control over every environmental variable. The tradeoff is upfront cost and ongoing electricity use, but the control you get is worth it for consistent results.
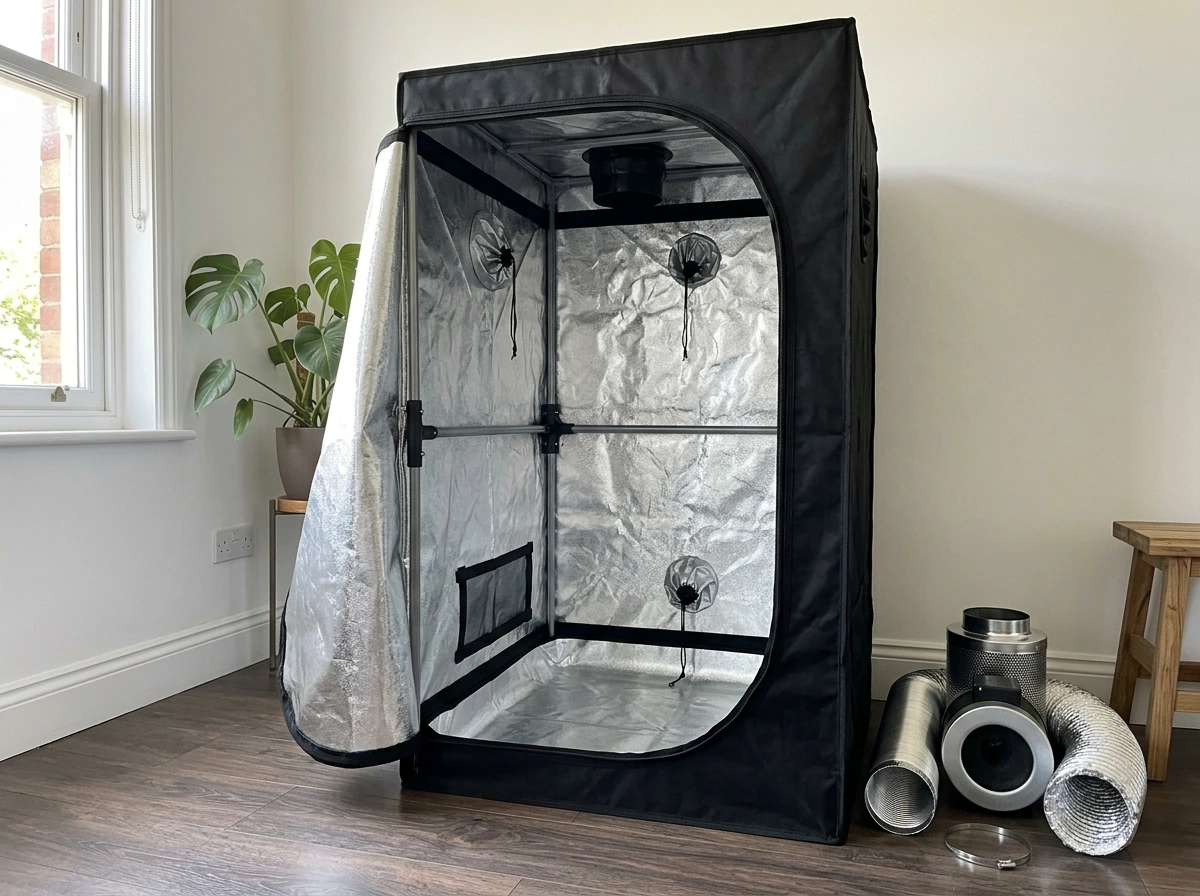
The minimum usable grow space for one to four plants is a 60x60cm grow tent, though an 80x80cm or 1.2x1.2m tent gives you much more flexibility for training and airflow. Grow tents are the standard choice because they are reflective internally (boosting light efficiency), easy to seal for odour control, and designed to accommodate fans, filters, and lights. Pick a space that stays relatively stable in temperature, an interior room or insulated garage works better than a shed exposed to NZ's coastal temperature swings.
Lighting
For beginners, a quality LED panel is the best starting point. Modern quantum board LEDs run cooler than older HPS (high-pressure sodium) lights, use less electricity, and produce a full spectrum suited to every growth stage. A rough guide: you want 200 to 400 true watts of LED power per square metre of canopy. For a 1.2x1.2m tent, a 400w to 600w LED is appropriate. HPS lights are still used by experienced growers and produce excellent results, but they generate more heat, which becomes a real management challenge in New Zealand's warmer months. CMH (ceramic metal halide) lights sit between the two and are worth considering for intermediate growers.
Airflow and climate control
Every grow tent needs an inline exhaust fan connected to a carbon filter for odour management, plus a passive intake or small intake fan to bring in fresh air. Aim to exchange the air in your tent every one to three minutes. For a standard 1.2x1.2x2m tent, a 150mm inline fan rated around 400m³/hour is adequate. You also need an oscillating clip fan inside the tent to strengthen stems and prevent hot or stagnant air pockets. Temperature target for the grow room is 20 to 28°C during lights-on and no lower than 16°C during lights-off. Relative humidity should sit at 60 to 70% during seedling and early veg, 40 to 60% during mid-to-late veg, and drop to 40 to 50% in early flowering, finishing at 35 to 45% in the final weeks before harvest. These are the numbers that prevent the two most common indoor disasters: mould and heat stress.
Other gear you need before you start
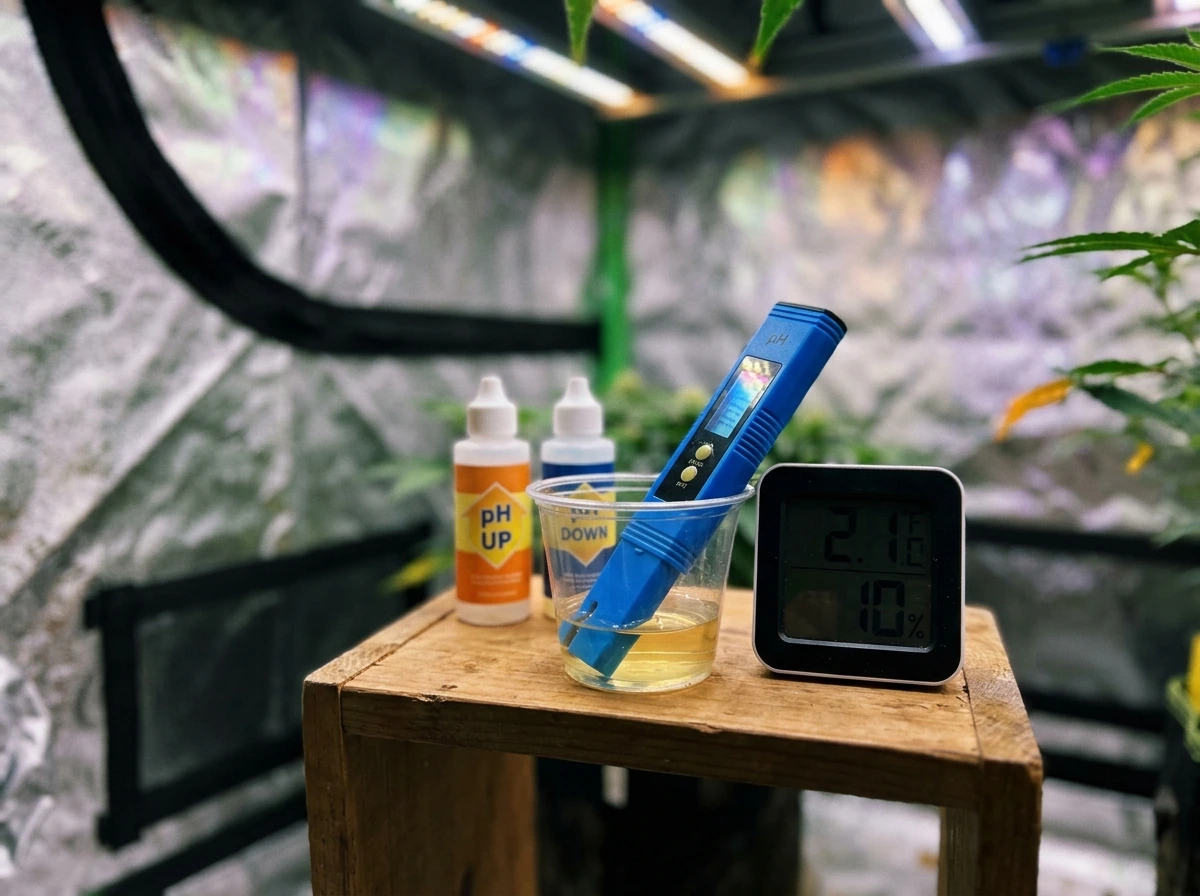
- A digital thermometer/hygrometer with min/max memory (place it at canopy height)
- A pH meter and pH up/down solution (critical for nutrient uptake)
- A TDS/EC meter if you plan to use liquid nutrients
- A timer for your lights
- Small seedling pots (0.5 to 1 litre), 3 to 5 litre veg pots, and final pots of 10 to 20 litres
- A quality growing medium (discussed below)
- Spray bottle for seedling watering
- Jeweller's loupe or pocket microscope (30-60x) for checking trichomes at harvest
Choosing seeds and germinating them reliably
Seed choice is one of the highest-leverage decisions you make. For beginners, autoflowering strains are genuinely worth considering. They flower based on age rather than light schedule changes, finish in 70 to 90 days from seed, and stay compact, which suits smaller tents. The tradeoff is that yields are typically lower than photoperiod plants and you cannot clone them easily. Photoperiod strains (regular or feminised) give you more control over plant size and tend to produce heavier yields, but require a deliberate light schedule change to trigger flowering. Feminised seeds, whether photoperiod or auto, eliminate the risk of male plants, which is a real bonus when you are learning.
Established seed banks ship to many countries and offer extensive strain catalogues. Look for reputable genetics from known breeders. When selecting a strain, consider the expected flowering time, typical height (important for tent dimensions), and stated THC/CBD ratios if those matter to you. Indica-dominant strains tend to stay shorter and finish faster. Sativa-dominant strains stretch taller and take longer to flower. Hybrids give you a blend of both.
The paper towel germination method
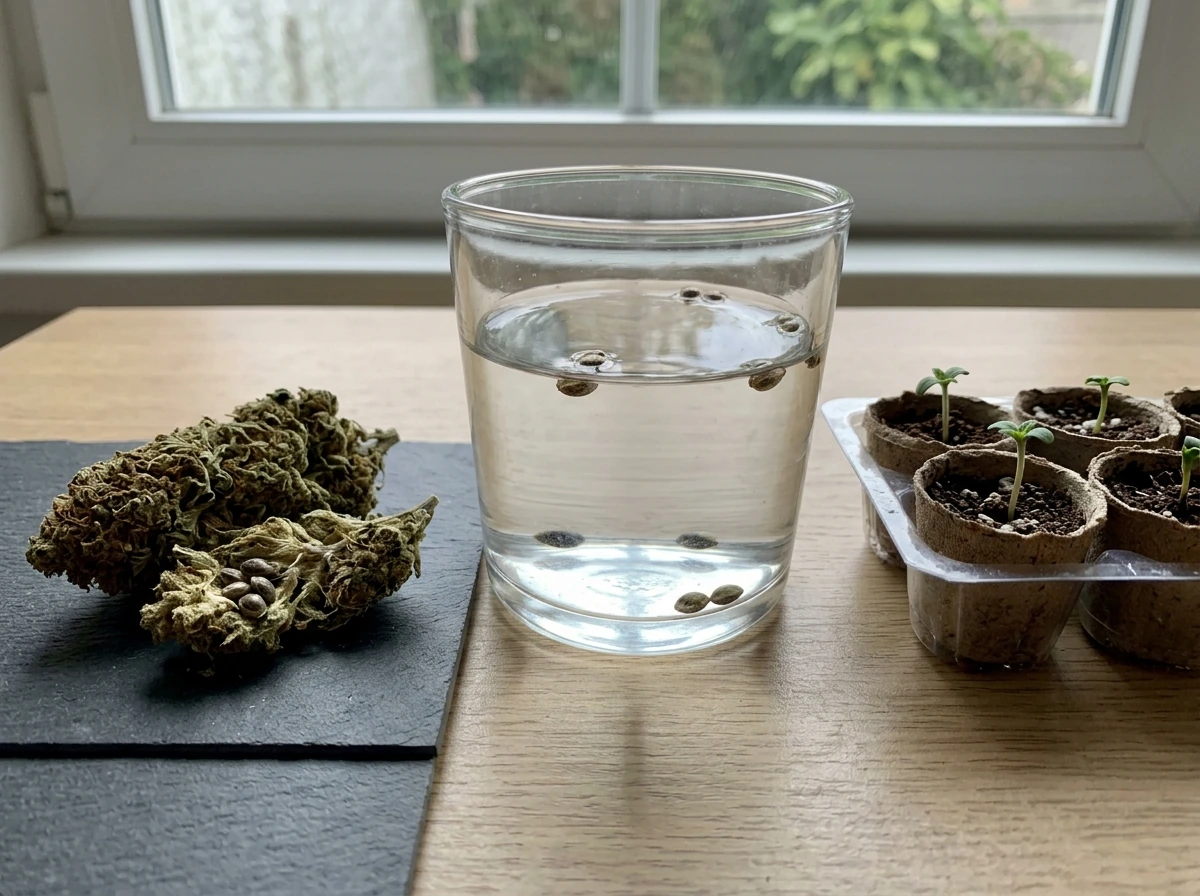
This is the method I default to because it lets you confirm viable seeds before committing them to soil. Dampen two sheets of paper towel, not soaking wet, just moist. Place your seeds on one sheet, fold the other over the top, and put the whole thing in a zip-lock bag or between two plates. Keep it somewhere warm, around 22 to 25°C. In 24 to 72 hours you should see a white taproot emerging from the seed. Once the taproot is 0.5 to 1cm long, it is ready to plant. Handle it with clean tweezers and plant it taproot-down, about 1cm deep in your seedling medium. Do not wait for the taproot to get longer than 2cm or it becomes fragile.
An alternative is direct-to-soil germination: plant the seed 1cm deep in moist seedling mix, cover lightly, and keep the surface moist with a spray bottle. This works well and avoids handling the fragile taproot at all. Either method works, the paper towel approach just gives you visual confirmation. Seeds that do not germinate within 5 to 7 days using the paper towel method are likely not viable.
What a healthy seedling looks like
Within 2 to 5 days of planting a germinated seed, you should see two small round leaves (cotyledons) pushing through the surface. These are not true leaves but they signal that germination succeeded. The seedling will look fragile and pale at first, which is normal. Within another 3 to 5 days, the first set of true serrated cannabis leaves appears. A healthy seedling is upright, the stem is short and sturdy (not stretched and leggy), and the leaves are a consistent light-to-medium green. A stretched, pale seedling reaching toward the light means the light source is too far away.
Seedling to vegetative growth: weeks 1 to 5
The seedling stage runs from germination until the plant has 4 to 6 sets of true leaves, usually 2 to 3 weeks. The vegetative stage follows and lasts until you trigger flowering (for photoperiod strains) or until the plant begins flowering on its own (for autos, typically around week 3 to 5 from seed). During veg, the plant is building its root system, stem, and canopy. Everything you do now sets up your final yield.
Lighting schedule and intensity
For photoperiod plants in veg, run your lights for 18 hours on and 6 hours off. This mimics long summer days and keeps the plant in vegetative growth. For autoflowering strains, many growers run 18/6 or even 20/4 from seed to harvest, since light schedule does not trigger flowering. During the seedling stage, keep your LED panel further away than you would for mature plants: around 60 to 80cm above the seedling to avoid light burn on those tender first leaves. As the plant matures, gradually lower the light to the manufacturer's recommended distance, typically 30 to 50cm for most quantum boards.
Watering approach
Overwatering kills more seedlings than any other single mistake. Cannabis roots need oxygen as much as water, and constantly wet soil suffocates them. The correct approach is to water thoroughly until runoff comes out the bottom of the pot, then wait until the top 2 to 3cm of soil feels dry before watering again. You can also lift the pot: a dry pot is noticeably lighter than a saturated one. For seedlings in small pots, a spray bottle is enough for the first week. pH your water to 6.0 to 7.0 for soil (6.0 to 6.5 is ideal) or 5.5 to 6.5 for coco coir or hydroponic setups. Getting pH wrong is one of the most common reasons plants look sick even when everything else seems fine.
Growing medium choices
For beginners, a quality pre-amended potting soil (one designed for cannabis or vegetables with good drainage) is forgiving and requires minimal added nutrients for the first 3 to 4 weeks. Coco coir is another popular choice: it drains extremely well, roots love it, and it gives you precise control over feeding because it has no nutrients of its own. The downside is that coco requires you to feed from very early on. Avoid using standard garden soil from outside, which can compact, harbour pests, and has unpredictable nutrient levels.
Transplanting
Start seedlings in small 0.5 to 1 litre pots or seedling plugs. When you see roots beginning to circle the bottom or poke out of drainage holes, it is time to move up. A standard progression is: seedling pot (0.5 to 1L), then a 3 to 5L pot for mid-veg, then a final 10 to 20L pot for flowering. Transplanting into too large a pot too early risks overwatering because there is more wet soil than roots to absorb it. Water the plant an hour before transplanting so the root ball holds together. Transplant gently, disturb the roots as little as possible, and water lightly after.
Triggering and managing the flowering stage
For photoperiod strains, you initiate flowering by switching your light timer to 12 hours on and 12 hours off. This mimics autumn day length and signals the plant to start producing buds. The transition from 18/6 to 12/12 is the single most important timing decision in your grow. Most growers flip to 12/12 when the plant has reached 30 to 50% of its target final height, because plants typically double or even triple in height during the stretch phase that follows, in the first 2 to 4 weeks of flowering. Misjudging this and flipping too late is a common beginner error that results in plants cramming against the tent ceiling.
Once you flip to 12/12, the dark period must be completely uninterrupted. Even brief light leaks during the dark period can cause stress, revert the plant to veg, or in the worst case cause hermaphroditism, where female plants develop male pollen sacs. Check your tent for light leaks using a phone camera in the dark. Seal any gaps with tape or rearranging ducting. This is one of those details that matters far more than it sounds.
Training methods worth knowing
Training is about managing plant shape to maximise the amount of canopy that receives direct light, which directly increases yield. Low-stress training (LST) involves gently bending and tying down branches to keep the canopy flat and even. It is beginner-friendly, reversible, and highly effective. Start LST in late veg when branches are still pliable. Topping, which means cutting the main growing tip to create two main colas, is another popular technique that creates a bushier plant with multiple bud sites. Do not top during the final 2 weeks of veg or you will not have time for recovery before flipping. Screen of Green (SCROG) involves weaving branches through a horizontal net to create an even canopy, ideal if you have a fixed tent width. Autoflowering plants are generally not topped because their fast timeline leaves little recovery time, but LST works well on autos.
Week-by-week flowering milestones
| Flowering Week | What to Expect | Key Action |
|---|
| Week 1 to 2 | Stretch begins, pre-flowers appear, white pistils visible | Confirm light seal, begin light nutrient increase |
| Week 3 to 4 | Rapid stretch, bud sites forming, calyxes stacking | Continue LST if using, watch for light distance as plants grow |
| Week 5 to 6 | Buds fattening, trichomes forming, aroma intensifying | Begin transitioning to bloom-focused nutrients, monitor humidity closely |
| Week 7 to 8 | Pistils darkening (orange/red), buds swelling, trichomes milky | Consider a flush if using synthetic nutrients, start checking trichomes |
| Week 9 to 11 | Trichomes shifting amber, buds fully dense, pistils mostly orange | Harvest window based on trichome inspection and desired effect |
Nutrients and environment: keeping your plant happy
Cannabis has different nutrient needs at different growth stages. The three primary nutrients are nitrogen (N), phosphorus (P), and potassium (K), and you will see these listed as an NPK ratio on any nutrient bottle. In veg, plants want higher nitrogen for leaf and stem development. In flowering, they want less nitrogen and more phosphorus and potassium to support bud development. Most beginner-friendly nutrient lines are designed as a two or three-part system with a base veg nutrient and a bloom nutrient. Start at 25 to 50% of the recommended dose on the label and increase gradually, observing how your plant responds before pushing further. Cannabis is sensitive, and less is almost always safer than more when you are starting out.
Always pH your nutrient solution after mixing, before feeding. In soil, aim for 6.0 to 6.5. In coco or hydro, aim for 5.5 to 6.2. pH that is too high or too low causes nutrient lockout, where nutrients are present in the solution but the plant cannot absorb them. This causes deficiency symptoms that look identical to actual under-feeding, which is why so many growers chase deficiencies with more nutrients when the real fix is correcting pH.
Common deficiency symptoms and what they mean
| Symptom | Likely Cause | Fix |
|---|
| Yellowing lower leaves, slow growth | Nitrogen deficiency | Increase nitrogen feed, check pH |
| Purple stems, dark green leaves | Phosphorus deficiency or cold temps | Warm the root zone, check pH, add P |
| Brown leaf edges, curling | Potassium deficiency or nutrient burn | Flush with pH'd water, reassess feed dose |
| Yellow between leaf veins (upper leaves) | Iron or magnesium deficiency | Correct pH first; add Cal-Mag if needed |
| Overall lime green appearance | Overfeeding causing lockout | Flush with plain pH'd water, let dry, reduce feed |
| Drooping, clawing leaves | Overwatering or nitrogen toxicity | Let soil dry fully before next water, reduce N |
A calcium and magnesium supplement (Cal-Mag) is worth having on hand, especially if you are using reverse osmosis or very soft water, which is common in many NZ regions. These minerals are commonly deficient in soft water grows and show up as yellowing between veins or brown spots on mid-canopy leaves.
A simple feeding schedule framework
- Seedling (weeks 1 to 2): Plain pH'd water only. Pre-amended soil has enough nutrients.
- Early veg (weeks 3 to 5): Begin feeding at 25% of recommended dose, veg nutrient formula.
- Mid to late veg (weeks 5 to 8): Ramp up to 50 to 75% of recommended dose.
- Early flowering (weeks 1 to 3 of flower): Transition to bloom formula, reduce nitrogen, maintain P and K.
- Peak flowering (weeks 4 to 7 of flower): Full bloom feed, add a bud booster if using one.
- Late flowering (final 1 to 2 weeks): Many growers flush with plain pH'd water to clear residual salts. This is debated but common practice.
Pests, diseases, and common indoor problems
Prevention is always easier than treatment. Keep your grow space clean. Remove dead or dying leaves promptly. Do not let standing water accumulate on saucers. Shower and change clothes before entering your grow space if you have been outdoors, especially around plants or gardens. Insects hitch rides on clothes, tools, and new plants. Never bring in cuttings from unknown sources without quarantining them first.
The most common indoor pests and how to handle them
- Fungus gnats: tiny flies hovering around soil, larvae damage roots. Fix: let soil dry more between waterings, use yellow sticky traps, treat soil with Bacillus thuringiensis israelensis (BTi) or neem-based drenches.
- Spider mites: tiny dots on leaves, fine webbing underneath. Fix: increase airflow and lower humidity. Treat with insecticidal soap, neem oil spray, or predatory mites. Catch them early.
- Thrips: silver streaking or stippling on leaves. Fix: neem oil or spinosad-based sprays. Remove heavily affected leaves.
- Aphids: clusters of small soft insects on new growth. Fix: blast off with water, follow with insecticidal soap or neem oil spray.
- Root aphids: harder to detect, cause general wilting and poor growth. Fix: soil drenches with appropriate approved pesticides. Difficult to eliminate completely.
Mould and damping off
Botrytis (grey mould) is the indoor grower's nightmare, especially during flowering when dense buds hold moisture. It appears as grey-brown fuzzy patches inside buds and spreads rapidly. Prevention is everything: keep relative humidity below 50% during late flowering, ensure good airflow through the canopy, and do not let leaves sit on top of buds. If you find it, remove the affected bud section immediately, dispose of it outside your grow space, and lower humidity. Damping off affects seedlings specifically: the stem at soil level turns brown and collapses. It is caused by overly wet, poorly aerated soil and often by pathogens in unsterile medium. Prevention: do not overwater seedlings, use a quality sterile seedling mix, and ensure good airflow even at the seedling stage.
Other common indoor problems and fixes
| Problem | Signs | Fix |
|---|
| Light burn | Bleached or yellowing leaves at the top of the canopy | Raise light, check manufacturer's distance recommendation |
| Heat stress | Leaves curling upward (tacoing), top leaves look burnt | Lower temp below 28°C, increase airflow, check light height |
| Nutrient lockout | Deficiency symptoms despite regular feeding | Flush with pH'd water, recheck and correct pH, resume feeding at lower dose |
| Overwatering | Drooping, heavy pot, consistently wet soil | Let medium dry fully before next water, improve drainage |
| Hermaphroditism | Banana-shaped pollen sacs in bud sites | Remove hermaphrodite plant immediately to prevent pollination, check for light leaks |
| Slow/stunted growth | Little progress week over week, small tight leaves | Check roots for binding, check pH, check temperature, assess light intensity |
Harvest, drying, curing, and what comes next
Knowing when to harvest is a skill, and getting it wrong in either direction affects quality significantly. The most reliable method is examining trichomes under a 30x to 60x jeweller's loupe or pocket microscope. Trichomes are the tiny resin glands that look like mushrooms. When they are mostly clear, the plant is not ready. When they are predominantly milky white (cloudy), the plant is at peak THC. When they start turning amber, THC is degrading into CBN, which has a more sedative, body-heavy effect. Most growers harvest when trichomes are 70 to 90% milky with 10 to 30% amber, depending on preference. Also watch pistil colour: when 70 to 90% of pistils (the white hairs on buds) have turned orange or red and curled in, harvest is approaching.
Flushing before harvest
In the final 1 to 2 weeks before harvest, many growers stop feeding nutrients and water with plain pH'd water only. This is called flushing and the goal is to clear residual nutrients from the medium and the plant. It remains a debated practice among experienced growers, with some studies suggesting minimal impact on final product quality. I still do it because I find it reduces the harshness of the smoke and it gives me a clear observation window on the plant's final stages. If you are growing in coco or hydro, a short flush of 3 to 7 days is more common than the 1 to 2 weeks used in soil.
Drying
After cutting the plant (you can harvest the whole plant at once or take branches as they ripen), hang branches upside down in a dark, well-ventilated space. Target temperature: 15 to 21°C. Target humidity: 45 to 55%. Air movement should be gentle, not blowing directly on buds. Drying takes 7 to 14 days. The buds are ready for curing when the small stems snap rather than bend, and the outside of the buds feels dry to the touch. Drying too fast (high temp, low humidity) locks chlorophyll in and produces harsh, grassy-tasting buds. Rushing this stage is one of the most common beginner mistakes.
Curing
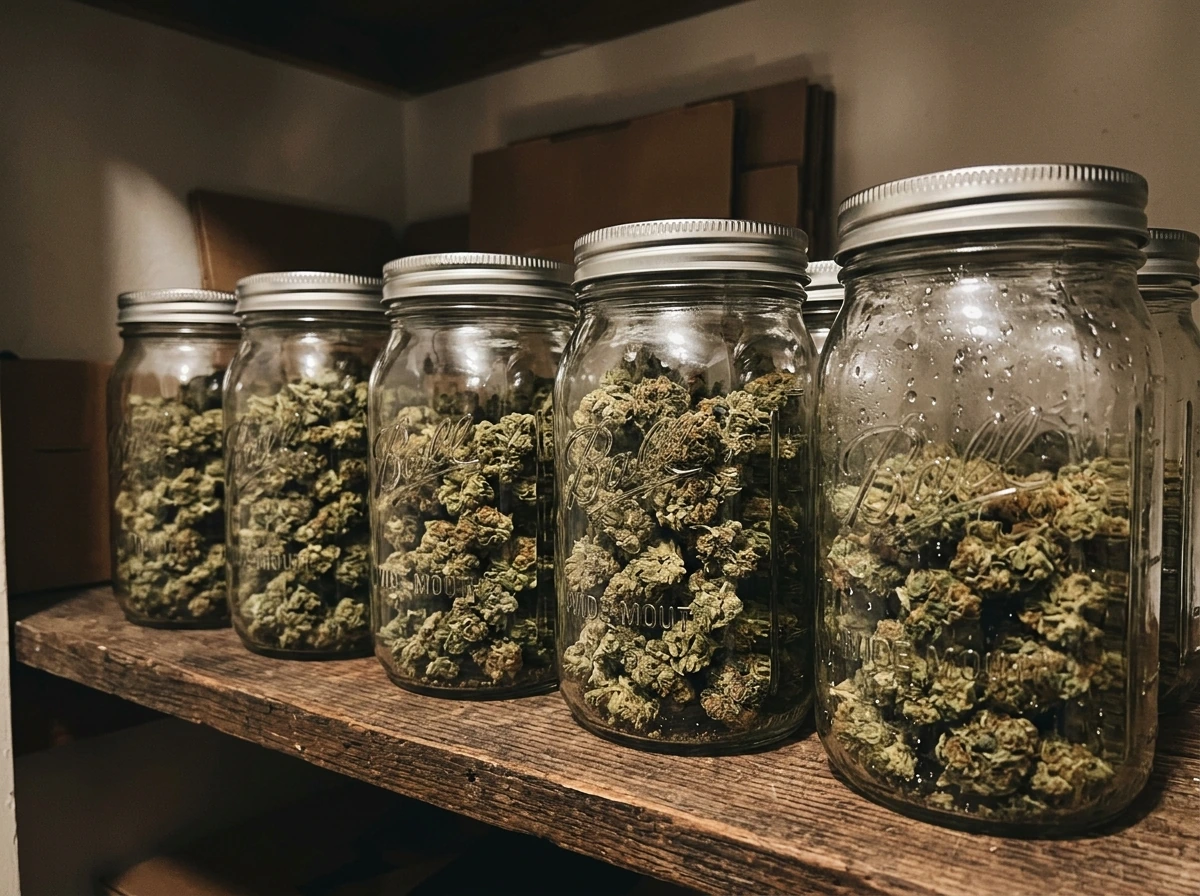
Curing is where flavour, aroma, and smoothness are developed. Place dried buds in wide-mouth glass jars, filling them about 75% full. Store in a cool, dark location. For the first week, open the jars once or twice a day for 10 to 15 minutes to allow moisture and gases to escape, a process called burping. If you smell ammonia when you open a jar, the buds are too wet and risk mould: leave the lid off for a couple of hours and check again. After the first week, burp once daily, then every few days. A minimum cure of 2 to 4 weeks transforms average buds into something noticeably better. Six to eight weeks of curing is where you really taste the difference. Boveda or Integra humidity packs at 58 to 62% relative humidity help maintain ideal moisture in the jar once you are happy with the cure.
Your next steps checklist
If you are in a jurisdiction where cultivation is legal and you are ready to get started, here is how to approach the first weeks, including how to grow weed from seed to harvest. The broader grow cycle and everything covered in this guide connects directly to the [seed-to-harvest journey covered in our detailed start-to-finish growing guides](/7F3D957C-F259-43E0-95B4-A7DDC4E66BDD), and if you want to go deeper on seedling care specifically, that topic deserves its own focused read.
- Week 0 (Before you start): Confirm local laws. Source your tent, light, fans, carbon filter, pH meter, and growing medium. Order seeds from a reputable supplier.
- Week 1: Set up tent, dial in temperature (20 to 28°C) and humidity (60 to 70%). Germinate seeds using paper towel or direct-to-soil method. Plant once taproot is 0.5 to 1cm.
- Week 2 to 3: Seedlings emerge. Keep light at appropriate distance. Water sparingly with pH'd water only. Monitor for stretch (adjust light if needed).
- Week 3 to 5: True leaves developing rapidly. Begin very light feeding (25% dose). Transplant to larger pot when roots circle the base. Start LST if using.
- Week 6 to 8 (photoperiod only): Assess plant height and health. If at 30 to 50% of target height, flip to 12/12 light schedule.
- Flowering weeks 1 to 9 (or longer depending on strain): Follow bloom feeding schedule, monitor humidity (target below 50% by week 5 of flower), check for pests and mould weekly.
- Final 1 to 2 weeks of flower: Flush or taper nutrients. Check trichomes daily with loupe. Harvest when trichomes are 70 to 90% milky white with some amber.
- Post-harvest: Dry for 7 to 14 days at 15 to 21°C and 45 to 55% RH. Cure in glass jars for a minimum of 4 weeks, burping daily for the first week.
Growing from seed indoors is genuinely one of the most rewarding processes once you get the fundamentals right. The biggest gains come from Growing from seed indoors is genuinely one of the most rewarding processes once you get the fundamentals right. The biggest gains come from getting your [environment dialled in](/CC68C0DC-2928-4212-B285-2843C4FB5C44), staying consistent with watering and pH, and not rushing the dry and cure at the end. Most of the dramatic problems you see on growing forums, yellow plants, drooping seedlings, buds that smell like hay, trace back to one of those three areas. Get those right and the plant does most of the work itself. Most of the dramatic problems you see on growing forums, yellow plants, drooping seedlings, buds that smell like hay, trace back to one of those three areas. Get those right and the plant does most of the work itself.